
Settings > Itinerary
There are two tabs in the itinerary settings.
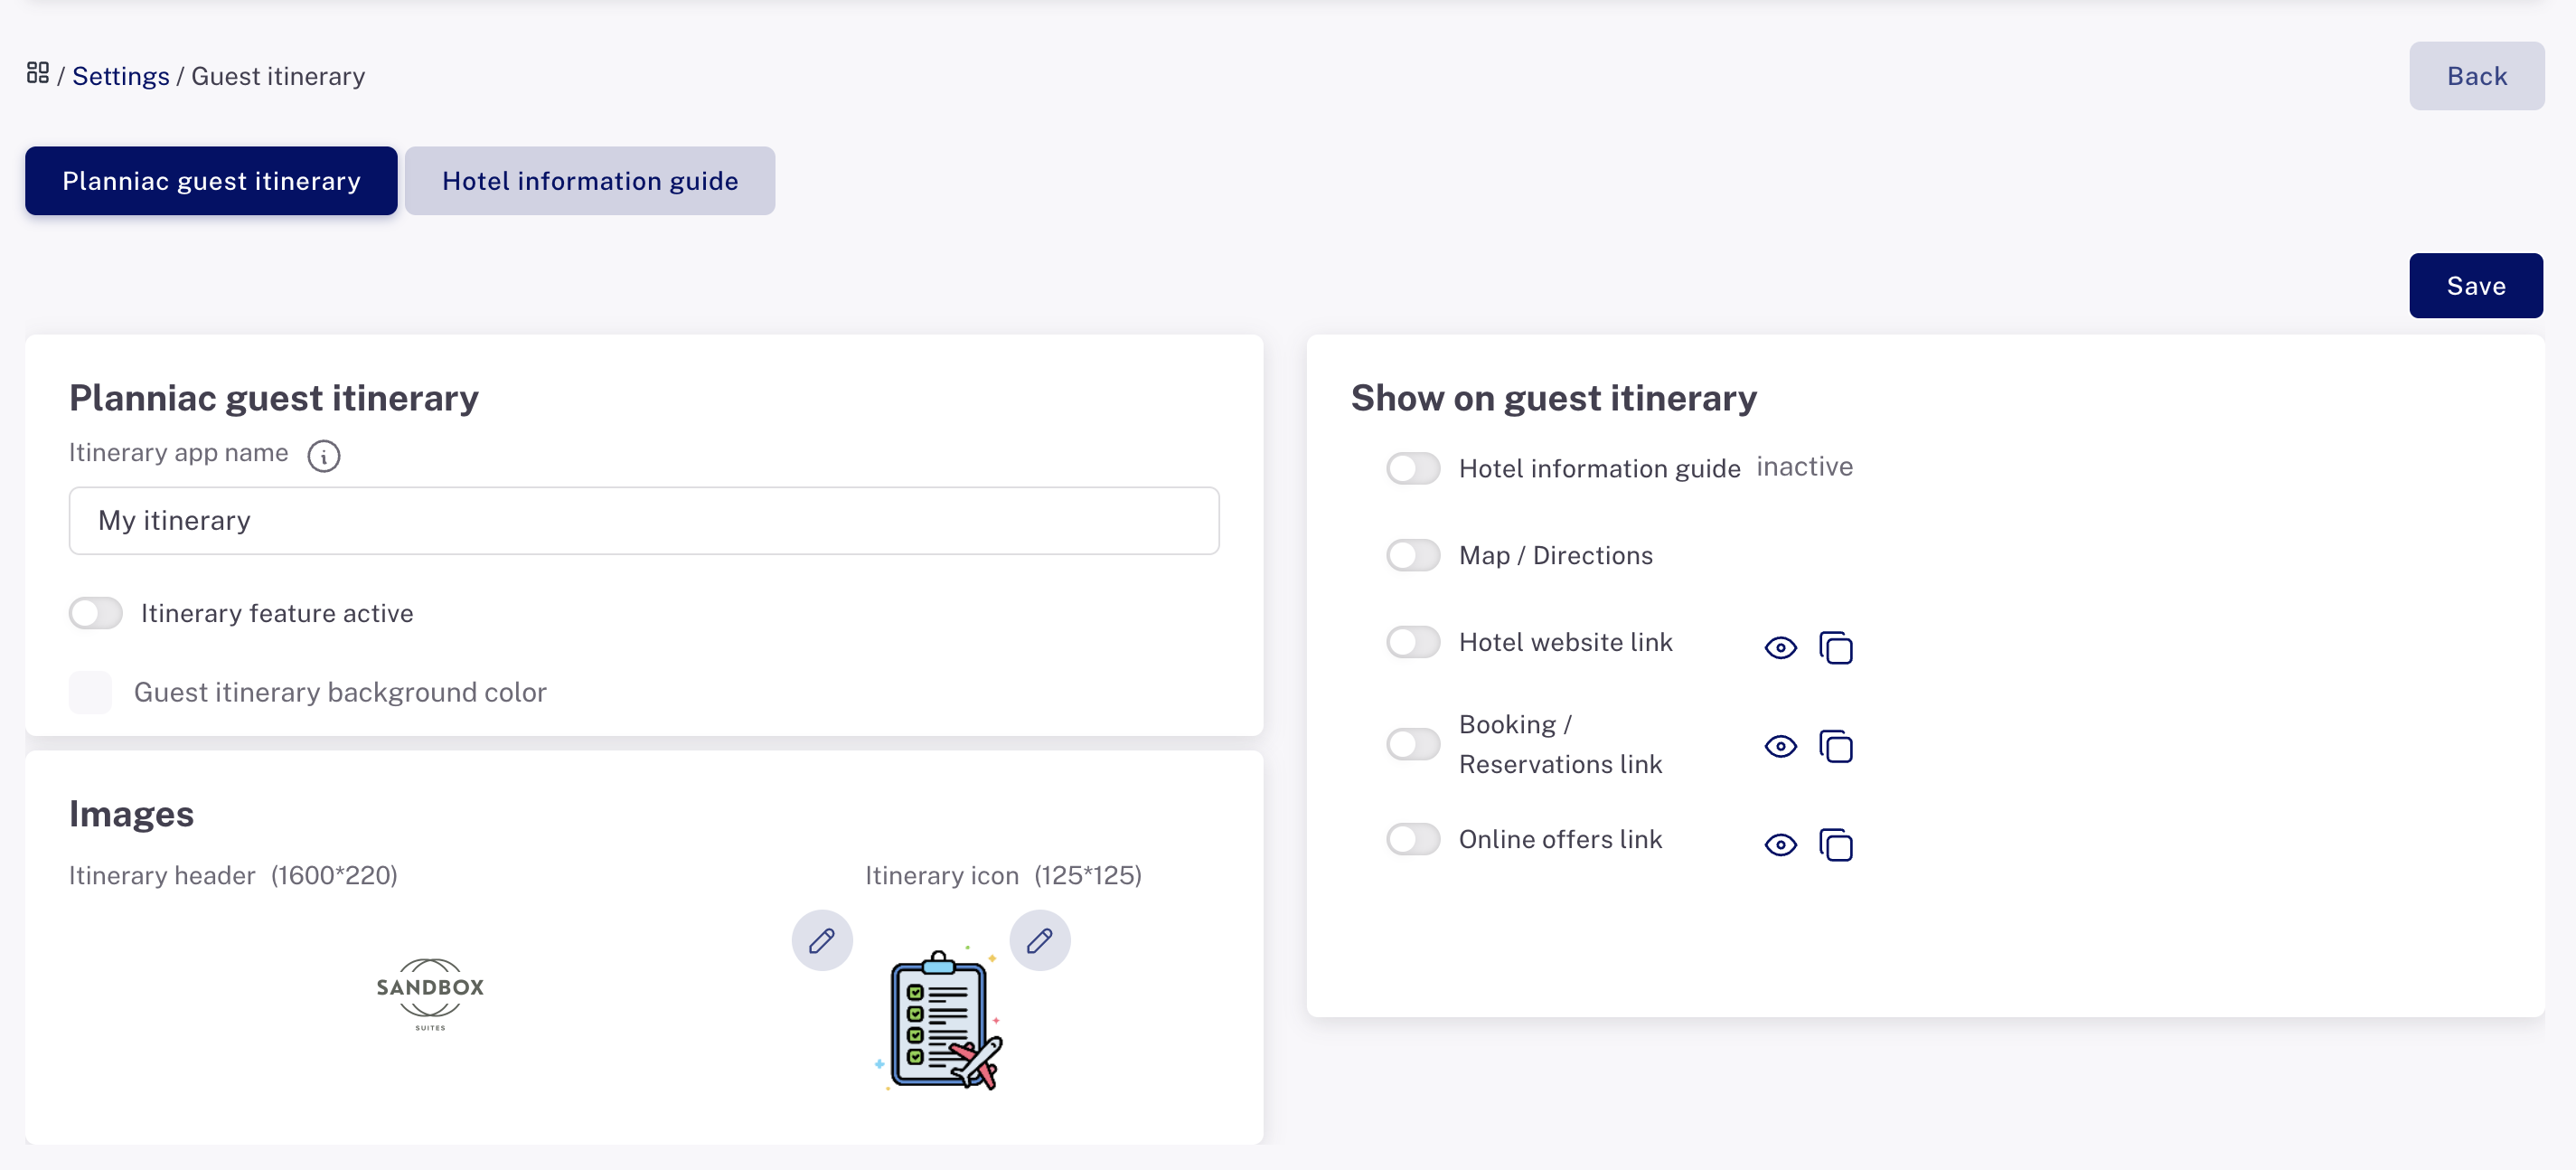
Guest itinerary settings
The first tab "Guest itinerary settings" includes what to display in the main part of the itinerary
- a toggle switch to activate the settings
- color and image settings
- background color
- banner
- icon (that displays when the guest saves the itinerary to their home screen)
- the settings for which information to activate in the navigation menu
- Hotel information guide. This must be activated to see the second tab.
- Map/directions. The map location set on the Business settings page will show on the guest itinerary if you enable this setting, as well as Google directions from the guest's location to your property.
- Hotel's website link. Enable this to give guests a link back to your main website. That web address will come from Business settings.
- Booking/reservation link (normally the PMS booking page). When this is enabled, your guest will be directed to the public booking link that you include in your Business settings.
- Online offers link. If you enable this, your guests will have a menu link to your online offers page.
Hotel information guide
Use these settings to customize a directory of your hotel's services.
At the bottom of the guests' mobile itinerary, you can display this as a hotel information guide.
This guide can include information about hotel facilities, services, upsells, dining, gift shop, and community information. It's completely flexible, so you can add as much as you like.
You'll notice a few 'fixed' sections that pull data from within Planniac.
- Wi-Fi. In addition to providing general wifi access codes, you have the option of setting codes on a per-room basis. This is done in the Settings > Manage rooms area.
- Door codes. If your hotel assigns unique door codes to guests, you can input them on the Guest detail screen. Doing this will automatically add them to the guest's itinerary.
The rest of the sections can be configured as needed. We've included some examples to get you started which you can easily edit – but you can create new ones too. For a quick start, just deactivate the ones you don't want to use and customize the sections that are relevant to your hotel.
Rearrange them using the drag-and-drop tools. Remember to save.